首先说一下我对 zookeeper 的学习,在刚开始听的时候觉得很高大上,但又觉得很陌生,也不知道是干嘛的,然后就网上查各种资料开始慢慢对 zookeeper 好像有点感觉了,又好像还是似懂非懂的样子,然后还看到网上都在告诉我们 zookeeper 的安装以及 zookeeper 集群的搭建,又尝试着去搭建了一遍。到最后还是有点晕乎乎的样子,总觉得好像不是很理解,包括网上说的 zookeeper 一些使用场景。
通过这些过程下来,我有点觉得刚开始既然不是很理解,那么就先不去理解它,不要尝试着钻牛角尖,为何不先试着在实践中动手接触它,感受它,在这之后有点感觉之后我们再去理解 zookeeper 背后的那些原理会不会更好一点呢?当然这只是个人看法,因人而异,如果有类似感觉的不防这样试试。那么接下来我就先说说 zookeeper 的安装以及搭建过程。
zookeeper 下载解压
在测试之前先说一下,zookeeper 的运行需要依赖 Java 运行环境,所以先要保证你安装好了 Java 环境。接下来下载 zookeeper 的最新稳定版 zookeeper-3.4.12 进行测试,下载链接如下:
由于本人使用的是 Ubuntu 16.04 系统版本,所以下面的测试也是基于该系统下进行测试的,当然在 Window 系统下步骤也是一样的,只是执行的方式不一样而已。将上面下载好的文件进行解压,最好解压到你常用的安装软件目录下,以便后面查找 zookeeper 配置文件的位置,当然如果说你知道你自己所放的位置那也无所谓了,当然我还是比较推荐把我们平常开发中常用的软件单独建一个文件夹保存,这样可以让我们的电脑文件不会显得很乱,后面的查找效率也会高很多。回到正题,下面是 zookeeper 的解压命令:
1 | tar -xzvf zookeeper-3.4.12.tar.gz -C /home/zhouxh/software/ |
zookeeper 单机搭建
解压好之后,记住你解压之后存放的位置,比如我上面,我存放在 /home/zhouxh/software/ 目录下面,接下来就切到该目录下的 zookeeper-3.4.12 目录下,里面有一个 conf 的目录,继续 cd 到 conf 目录下,这个目录存放的就是 zookeeper 运行时需要的配置文件,这里我们先将里面的 zoo_sample.cfg 文件拷贝一份并且重命名为 zoo.cfg,然后编辑 zoo.cfg 文件,这里我们先不说文件中的各项配置是什么含义,先照着做就可以了,到后面会详细解释,打开 zoo.cfg 文件,在里面修改 dataDir 配置然后再加上 dataLogDir 配置,该文件的全部配置如下:
1 | # The number of milliseconds of each tick |
上面配置文件中修改和添加的这两项配置都有一个路径,也就是刚才解压的 zookeeper 文件所在路径,在 zookeeper 的目录下创建两个文件夹:data 和 logs,创建好之后单机模式的 zookeeper 文件配置就已经配置好了,然后我们就可以运行了,为了运行方便,最好我们把 zookeeper 命令路径配置到环境变量中去,这样我们就不用每次执行都切换到 zookeeper 目录下的 bin 目录中去,如果没配那就到 zookeeper 的 bin 目录下去执行命令,启动命令如下:
1 | ./zkServer.sh start |
启动完成之后再执行查看 zookeeper 的运行状态的命令:
1 | ./zkServer.sh status |

也可以通过客户端命令来连接 zookeeper 服务来判断是否启动成功,如果是 zookeeper 是在本机上那么直接执行以下命令就好:
1 | ./zkCli.sh |
如果是跨机器连接的话则需要加参数,-server 后面加上要连的服务 IP 和端口,IP 是你要连的 zookeeper 服务所在机器的 IP,端口就是刚才 zoo.cfg 中的 clientPort=2181 配置的端口。
1 | ./zkCli.sh -server 127.0.0.1:2181 |

连接成功之后我们就可以对 zookeeper 服务上的节点以及节点中的数据进行增删改查了,这里提一下,zookeeper 中的节点结构类似于 Linux 系统下的文件路径,都是树形结构。到这里单机模式的搭建就已经完了,接下来我们再尝试着搭建 zookeeper 伪集群模式。
zookeeper 伪集群搭建
有了之前单机模式下搭建过程,伪集群其实也差不多,之所以说是伪集群,是因为是在同一台电脑上模拟出来的多台服务,这里以三台为例进行模拟搭建,当然如果你条件够宽裕,也可以直接在三台电脑上进行搭建,当然这三台电脑需要互相可访问,因为他们之间需要通信。下面是在单台电脑上搭建伪集群的过程:
首先我们将之前用到的 zoo.cfg 拷贝三份放在 conf 目录下,分别命名为 zoo1.cfg,zoo2.cfg,zoo3.cfg,然后分别修改这三个文件,下面我先贴出第一个服务 zoo1.cfg 的配置内容:
1 | # The number of milliseconds of each tick |
其他两个文件只需要修改其中一个客户端端口和两个路径就好,其他的和上面配置内容一致。
zoo2.cfg 不同部分配置内容:
1 | dataDir=/home/zhouxh/software/zookeeper-3.4.12/data2 |
zoo3.cfg 不同部分配置内容:
1 | dataDir=/home/zhouxh/software/zookeeper-3.4.12/data3 |
看了上面三个文件的配置内容,我们应该能猜到接下来我们还需要在对应路径下创建几个文件夹,分别是:data1,data2,data3 以及 log1,log2,log3,
1 | /home/zhouxh/software/zookeeper-3.4.12/data1 |
同时我们还注意到每个配置文件都多了一小部分内容:
1 | server.1=192.168.1.108:2881:3881 |
这部分内容中 server 后面的那个数字是区分各个不同服务的,这个数字还需要在我们刚才新建的那三个文件夹 data1,data2,data3 下面分别新建三个文件,文件名为 myid,这个文件就只写入这个数字就好,也就是 data1 目录下的文件 myid 内容为 1,data2 目录下的文件 myid 内容为 2,data3 目录下的文件 myid 内容为 3,当然如果是三台不同的机器的话,就是把刚才创建三份的文件夹以及文件在每台机器上配置一份就好,内容可以不变,端口那些可以自己定,也可以完全按照上面的方式配置。到这里配置部分就结束了,接下来我们就可以测试我们的配置是否正确了。
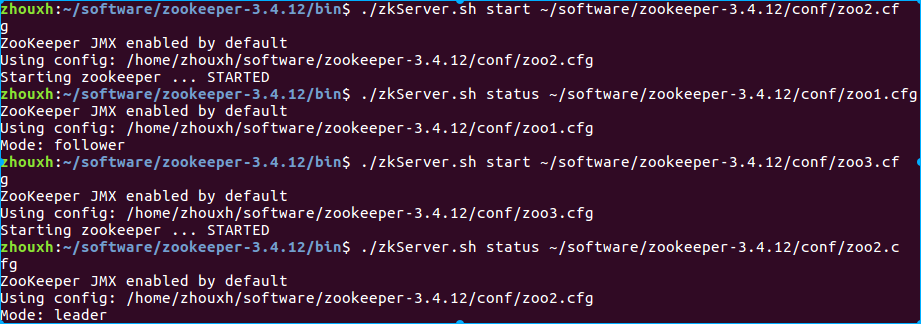
首先我们依次将三个 zookeeper 服务分别启动起来,每启动一台查看一下当前启动的 zookeeper 的运行状态,切换到 zookeeper 的 bin 目录下进行启动,启动命令如下:
1 | ./zkServer.sh start ~/software/zookeeper-3.4.12/conf/zoo1.cfg |
上面将第一台 zookeeper 服务先启动,启动后紧接着查看其运行状态发现会报如下一个错。

这是由于其他两台还没启动,所以我们先不管,继续启动另外两台服务
1 | ./zkServer.sh start ~/software/zookeeper-3.4.12/conf/zoo2.cfg |
不出意外的话,当启动第二台后再查看第一台服务状态时会打印如下信息:

这表明我们已经启动成功了,继续启动第三台就好,当三台全部启动成功后说明我们的伪集群搭建成功了。
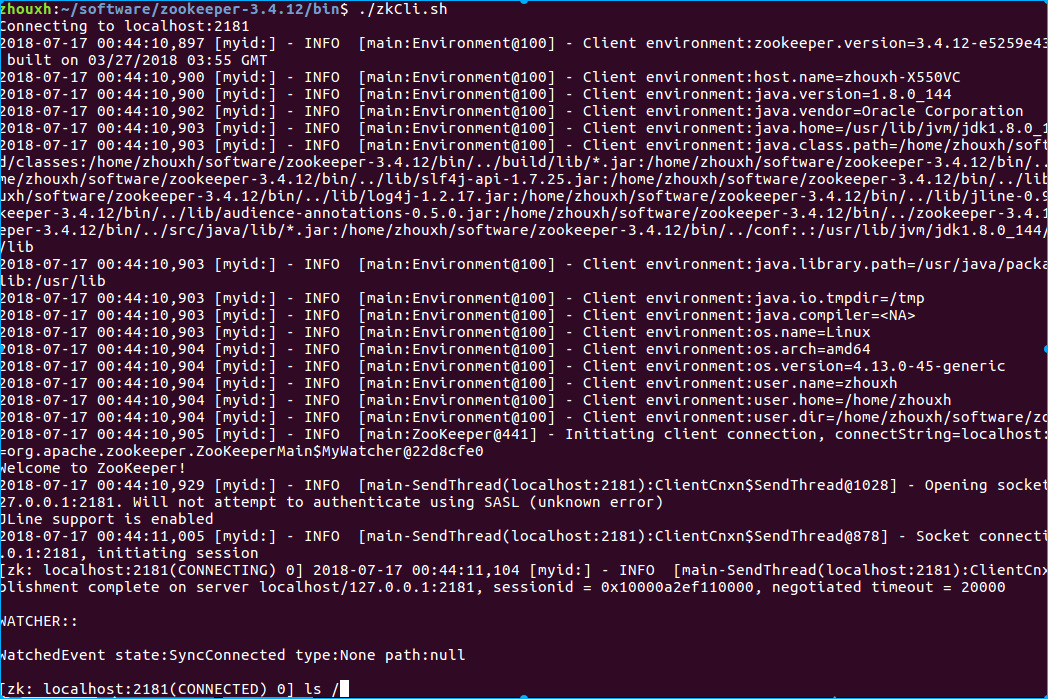
我们也可以尝试用 zkCli.sh 命令去连接这个集群看看能不能连上,由于这三台已经是集群模式,我们任意连接其中一台都是一样的,以连接第一台为例:
1 | ./zkCli.sh -server 127.0.0.1:2181 |
出现如下信息表示连接成功:

上面就是我们搭建的整个过程,搭建完成后最好回顾一下,如果中间遇到什么问题可以直接网上搜索,肯定能找到的,现在我们只是初步了解了 zookeeper 服务的搭建过程,具体这些配置文件中的含义以及为什么要搭建集群,为什么选择三台进行模拟集群,这样做有什么好处;还有就是 zookeeper 到底应该怎么用,哪些情况下需要用到 zookeeper,下一篇将会详细介绍。

